How to create a file with partial UV coating
With the partial UV coating or spot coating you refine selected locations in designs with a colorless high-gloss finish. The combination of shiny patches on a matt surface area results in an exciting contrast. Even the brilliant use of glitter paint, or the poignant use of scented varnish often is used.
Below you will find detailed instructions to help you refine easily and in minutes your printing needs in popular graphics programs with UV coating.
Creating a file with partial UV coating
If the file is partially coated with UV coating, you must rename the surface with Lack. This is then detected by our prepress as a UV lacquer. Since the paint is transparent, the elements with the color of paint must be set to overprint.
Creating the UV lacquer in Photoshop
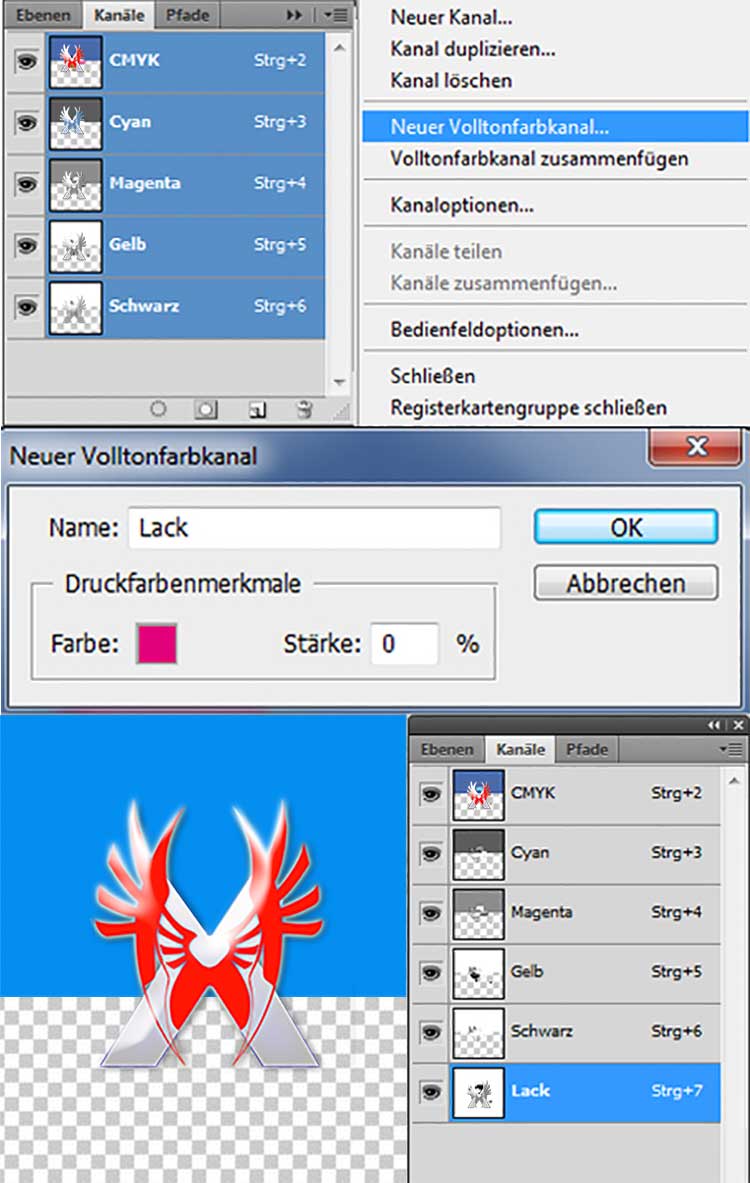
If you create your data into Photoshop, you need for the paint to create a new spot color channel and call this Lack. As color choose magenta. The intensity of the color set to 0%, so you can see the underlying objects well.
If you click now only the paint channel in the Channels palette, everything what you write, draw or insert is now painted on this channel. Please note that you are using magenta with 100%. The color Lack should always be 100%, a rasterized transparent or mixed color makes no sense. On the lacquer layer in the Channels palette, the objects should now be highlighted with black.
Save your as a DCS 2.0 format. This file format allows multiple color channels and not be reduced to one channel.

Creating the UV lacquer in InDesign
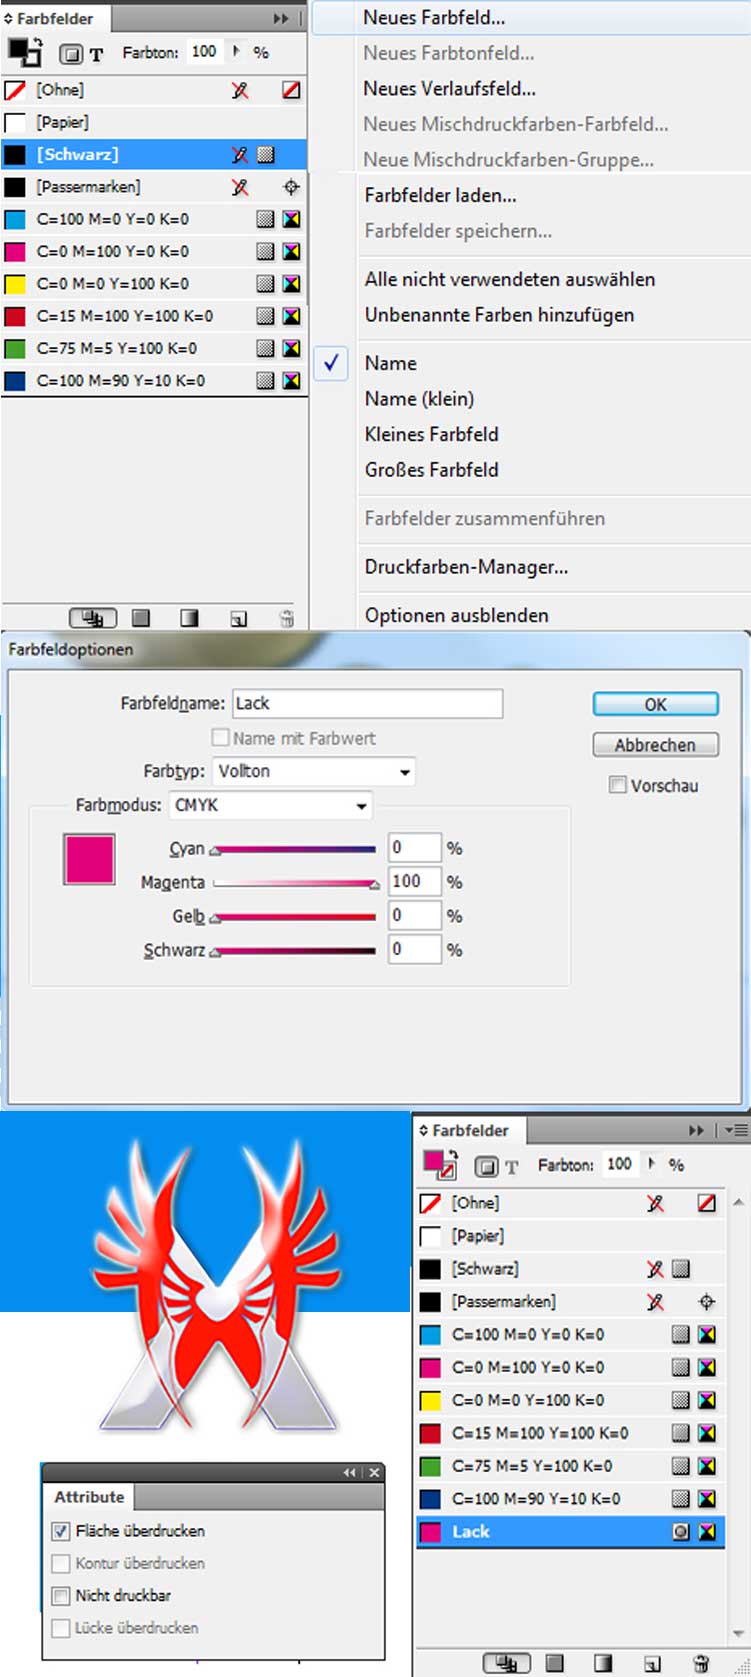
In Adobe InDesign choose Lack as regular paint color in the Swatches palette. To create a lacquer color choose in the Swatches palette New Swatch. This opens a new dialog box. Here you enter the paint color name Lack. Since this color is not composed of CMYK, choose the color type full color. Now set as 100% Magenta color. Now select the item of your choice with the black arrow and duplicate this. Place the item exactly over the other and color that with the new createt Lacquer-Color. Make sure that you make all the objects you have colored with the lacquer paint to overprint. To do this in the Attributes palette and mark surface overprinting with a check mark.
Export your data to PDF. Please make sure that the point Output at dialog box – export options is a solid color paint with the name Lack appears in the Ink Manager. Find it here, you can export the PDF as usual.
